
When an ultrasonic seam begins to look inconsistent, the horn and anvil are important suspects—but they are not the only suspects. A responsible investigation distinguishes tool condition from material variation, alignment, pressure, amplitude, cycle settings, web handling, and inspection error before changing components or settings.
This guide is for PP non-woven bag operations using ultrasonic joining or cutting/sealing equipment. It is not a substitute for the exact generator, press, horn, anvil, and machine manual. Ultrasonic assemblies are tuned mechanical systems. Only trained and authorized personnel should inspect, remove, install, torque, alter, or troubleshoot them under the documented safety and energy-control procedure.
Define the seam symptom before naming the cause
“Weak seam” may mean a seam that opens under a defined test, a visibly incomplete bond, a narrow bond pattern, a burnished or damaged area, an intermittent unbonded zone, a cut that does not separate cleanly, or a failure that occurs next to rather than through the seam. Each points to different evidence. Start with the buyer-approved bag drawing, seam location, visual standard, test method, specimen conditioning, and acceptance rule. If none exists, create and approve one before making quality promises.
Preserve sequential samples and record the time, line, product, material lot, recipe revision, speed, and any alarms or stops. Photograph both faces with an orientation mark and scale. Note whether the defect repeats at the same place across the seam pattern or moves with the web. A fixed recurring feature supports an investigation of horn/anvil pattern, mounting, or local contact. A changing pattern can support material, tension, registration, or process variation. Do not treat one dramatic sample as a population.
Understand what the horn and anvil do—and their limits
In a typical ultrasonic stack, a converter creates vibration, a booster can alter amplitude, and a horn transmits ultrasonic vibration to the work area. The anvil provides the opposing surface or pattern in the relevant machine arrangement. The exact roles, geometry, frequency, materials, and permitted service actions vary by supplier and model. In Branson documentation for one Ultraseal system, the horn is described as a resonant device that transfers ultrasonic vibration and should not be altered without appropriate training and advice; the manual describes its own anvil as high-grade tool steel with a protective coating. Read the original manual for its specific equipment context.
The useful general lesson is not “all horns and anvils behave the same.” It is that a horn, tip, and anvil are functional parts of a tuned and loaded system. Surface damage, contamination, looseness, incorrect mounting, altered geometry, misalignment, or use outside the validated material/process window may change seam appearance and performance. The correct corrective action depends on verified evidence and OEM guidance.
Build an evidence hierarchy for seam investigations
| Evidence layer | Questions it answers | Common error to avoid |
|---|---|---|
| Finished bag and seam samples | What is failing, where, and with what repeat pattern? | Judging only one close-up or mixing sample order |
| Product and material records | Did fabric, laminate, print, thickness, or lot change? | Assuming all non-woven fabric behaves identically |
| Recipe and event history | Did approved settings, speed, alarms, or interventions change? | Overwriting settings before recording the original condition |
| Authorized tool inspection | Is there visible wear, damage, deposit, looseness, or misalignment? | Touching or modifying a resonant assembly without procedure |
| Controlled comparison | Which single change alters the measured result? | Changing tool, material, speed, and settings simultaneously |
The hierarchy matters because ultrasonic equipment can appear to “respond” to a setting change even when the underlying cause is elsewhere. If a technician increases a parameter, cleans an anvil, changes a fabric roll, and lowers line speed in the same hour, a later good seam proves only that something changed. It does not prove which intervention is repeatable. Preserve the original state, define one hypothesis, and use a safe controlled comparison.
Inspect safely and only through approved methods
Tool inspection may require opening guarding, entering a station, or handling sharp, hot, heavy, or resonant components. Follow the written isolation and verification process for the exact machine. ISO 14118 addresses prevention of unexpected startup, while local rules and the machine manual define actual working methods. ISO’s scope page describes the prevention-of-unexpected-startup purpose. It does not authorize a generic inspection sequence.
Authorized personnel can use the OEM inspection criteria to look for deposits, visible pattern damage, uneven contact evidence, fastening issues, cracks, corrosion, coating condition, and alignment indicators. Record observations without scraping, grinding, polishing, filing, or changing a component unless the specific manufacturer procedure permits it. A well-intended alteration can change resonance, contact geometry, or tool life. When in doubt, preserve images, part identification, and symptoms and consult the equipment supplier.
Separate tool condition from material response
PP non-woven fabric may change with basis weight, fibre distribution, laminate, pigment, print, treatment, storage, moisture exposure, roll tension, and construction. A seam can therefore change when the tool is stable. Use material lot identity in every investigation. Compare samples produced with the same controlled machine condition across different material lots, or compare a suspect condition against retained approved material where available. Keep the test conditions and sample preparation consistent.
Material tests should be described honestly. ISO 9073-3 covers tensile-strength and elongation testing for nonwovens; the ISO page identifies that scope. It is not a direct finished-bag seam qualification method. A bag seam may need a separately agreed peel, pull, carry, burst, or functional-use method depending on design and customer use. State the test direction, grips, speed, sample conditioning, failure mode, and acceptance requirement; otherwise a number cannot be compared across lots or factories.
Inspect the seam pattern, not only the average result
An average test result can hide a local pattern defect. Examine where failure initiates: at the start/end of a weld, at a repeated point on the pattern, at an edge near a handle reinforcement, after a printed region, or randomly along the seam. Map the location to the tool orientation. If every weak point corresponds to the same physical feature on the horn or anvil, tool condition or alignment deserves priority. If failure moves with bag length or fabric roll position, inspect web and material branches first.
Build a visual seam atlas showing approved appearance, caution conditions, and reject conditions for each major bag family. Include both “too little bond” and “too much process effect” examples. Excessive crushing, distortion, holes, or visually damaged material can be a quality concern even when a simple pull result appears high. The accepted seam is a complete product requirement, not a maximum-force contest.
Use controlled trials to discriminate between hypotheses
Freeze the current recipe and save the required backup before authorized changes. Define the suspect symptom and the minimum sample sequence. Then choose a comparison that can answer a question. If tool condition is suspected, an authorized inspected or approved replacement tool may be compared under the same material and settings. If material is suspected, compare lots under the same approved tool and recipe. If speed is suspected, use documented speed steps while maintaining all other permitted settings. If alignment is suspected, inspect and correct only through the OEM method, then repeat the same measurement.
Record the result that would disprove the hypothesis, not only the hoped-for result. For example, if a replacement horn changes nothing across sequential samples while material lot changes do, tool wear is less likely to be the primary cause. If a local repeated failure disappears only after an authorized tool change under controlled conditions, the tool hypothesis becomes stronger. Repeat enough samples to see variation; do not declare a root cause from a single bag.
Set preventive inspection triggers from evidence
Use a condition record for each horn/anvil assembly: part ID, machine, product families, accumulated usage indicator where available, service history, visual inspection result, defect trends, alarms, material lots, and authorized actions. A calendar interval or cycle count can trigger inspection, but the final decision should include actual condition and quality evidence. Different bag families may create different loading; do not assume one interval applies across all constructions.
Set alert rules before a serious failure. These might include a rising trend in seam-related rejects, recurring local visual defect, an agreed shift in functional-test distribution, an abnormal alarm pattern, or a known event such as a contact incident. The alert should trigger containment and inspection according to authority, not an unapproved parameter escalation. This turns maintenance from reactive replacement into a documented risk-control process.
Make support requests actionable
When seeking help from the machine Manufacturer or technical Supplier, send the serial number, generator/press/tool identification, product and recipe revision, material lot, ordered sample photos, test method and raw observations, speed, alarm history, date of last approved maintenance, and a short chronology. State which actions were already taken and whether they were authorized. Do not send passwords, sensitive access credentials, or ask remote personnel to direct hazardous live work.
A well-prepared request lets technical support distinguish possible resonance/tool questions from material, setup, and process-control questions. It also creates a clean record for a buyer: the factory did not hide a problem or randomly adjust a process; it contained the issue, preserved evidence, and obtained informed assistance within the correct safety boundary.
Case study direction: demonstrate whether a seam-alert system finds change earlier
This is a study design, not a reported Zhengxin customer case. Over comparable bag-family runs, record seam-related rejects, visual severity score, functional-test results under one agreed method, tool inspection findings, material lot, recipe revision, and intervention time. In a baseline period, use the existing response method. In a later period, introduce a defined alert trigger, sequential sampling, and tool-condition record. Keep the product family and test method comparable, and record all schedule or material changes that could influence results.
Primary outcomes can include the share of seam trends detected before final packing, time from alert to contained decision, and repeat occurrence after an authorized correction. Secondary outcomes can include scrap, planned versus unplanned service, and agreement between inspectors scoring the same samples. Report limitations openly. If the comparison coincides with a new material supplier or a major product mix shift, do not claim the alert system alone caused the change.
Translate technical control into buyer confidence
Overseas buyers should ask how a supplier defines a conforming seam, identifies a material lot, records recipe/tool service, and responds to an abnormal trend. For a customized bag or an OEM/ODM machine application, agree the seam sample, test method, product orientation, packaging, and release evidence during development. If a claim such as “strong ultrasonic seam” appears in marketing, ask what bag construction and acceptance method support it. A credible supplier welcomes this clarification because it prevents subjective acceptance later.
The most useful evidence is not an unsupported strength number. It is a controlled story: approved sample; defined test; traceable material and setup; in-process observation; documented release; and a safe, evidence-led response when results change. That is how tool maintenance, process quality, and export communication reinforce each other.
Frequently Asked Questions
Does every ultrasonic seam defect mean the horn or anvil is worn?
No. Material variation, alignment, recipe changes, pressure, speed, web handling, contamination, mounting, and inspection method can also affect the seam. Preserve sequential evidence and test one hypothesis at a time.
Can a horn be polished or modified to improve a seam?
Only if the exact OEM procedure explicitly permits it and trained authorized personnel perform the work. Ultrasonic components are tuned systems; unauthorized alteration can create quality, reliability, and safety problems.
What is the right seam-strength test for a non-woven bag?
It depends on bag design and customer use. Agree the specimen preparation, conditioning, direction, test method, failure mode, and acceptance criterion with the buyer or product specification. Do not assume a base-material tensile standard qualifies a finished seam.
How often should ultrasonic tooling be inspected?
Set a local trigger using product family, service history, usage exposure, quality trend, and OEM guidance. There is no universal interval that safely applies to all machines, tools, materials, or bag designs.
What should be included in a technical-support request?
Include machine and tool identification, product/recipe revision, material lot, sample sequence and photos, test method/results, speed and alarm history, maintenance history, and a concise chronology. Keep all hazardous inspection and adjustments within the approved site procedure.
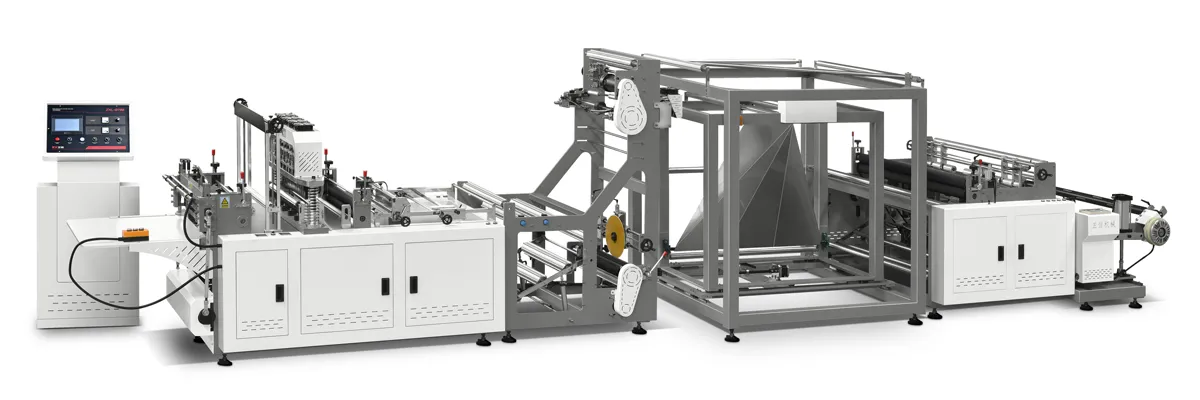
ZXL-A700背心袋无纺布制袋机.webp)
 English
  العربية
  Español
  Русский
  O‘zbekcha
  Қазақ тілі
  Português (AO90)
  Tiếng Việt
  (فارسی (افغانستان
  Kiswahili
  አማርኛ
አማርኛ  தமிழ்
தமிழ்  Bahasa Indonesia
  اردو
اردو  हिन्दी
  বাংলা
বাংলা