
The correct web tension for PP non-woven fabric is the lowest stable tension that keeps the web controlled through each process zone without wrinkles, slack, slip, stretch, edge damage, or registration loss. There is no universal setting in newtons that works for every GSM, roll width, bonding pattern, bag style, or machine.
Start with the Symptom, Not the Tension Knob
When a web wrinkles, operators often add tension. That may flatten the web briefly while increasing stretch, roller deflection, edge curl, or feed slip. When bag length drifts, they may reduce unwind brake force even though the real problem is a glazed nip roller. Tension is part of a system that includes roll quality, alignment, web guiding, roller geometry, nip pressure, acceleration, and downstream draw.
General web-handling guidance from Maxcess notes that improper or excessive tension can contribute to wrinkling, stretching, web breaks, and roller deflection. The practical conclusion is simple: adjust only after defining where the symptom first appears.
Divide the Line into Tension Zones
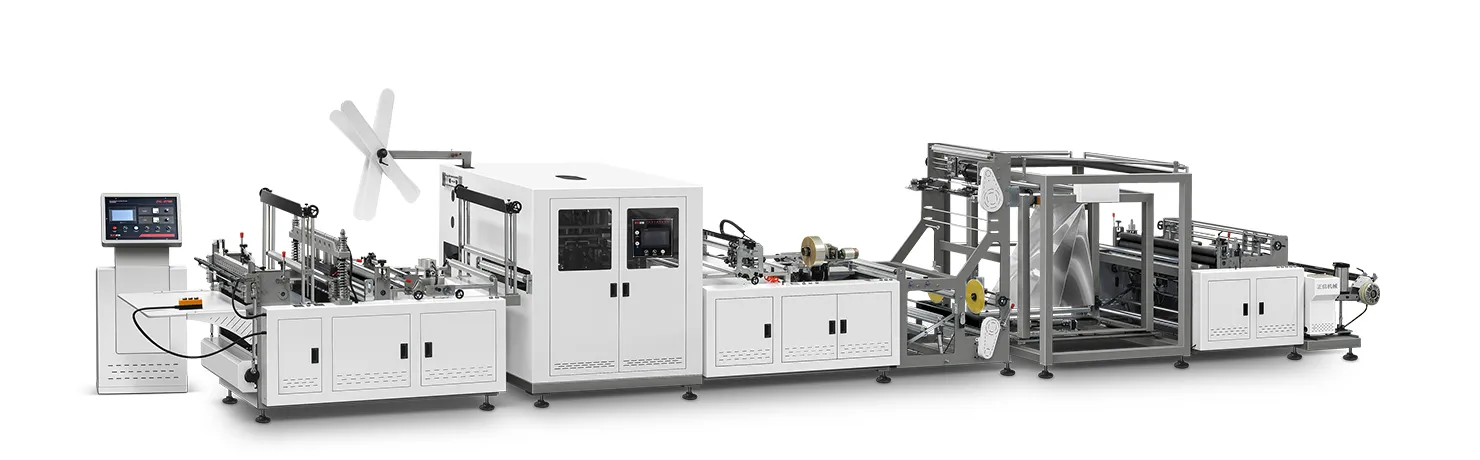
A long bag-making line does not have one meaningful tension value. A driven or controlled element creates a boundary between zones. Map the actual machine before testing.
| Zone | Main control task | Typical evidence |
|---|---|---|
| Unwind to first pull point | Control roll inertia and diameter change | Dancer position, brake output, roll condition |
| Web guide and folding | Maintain lateral position without diagonal loading | Edge position, guide travel, wrinkle direction |
| Gusset or forming section | Feed layers evenly through geometry changes | Fold dimensions, left-right tension, rubbing |
| Feed to seal and cut | Prevent slip while preserving set length | Nip pressure, roller surface, encoder and bag length |
| Handle or auxiliary feed | Synchronize a second web with the bag body | Loop length, placement, splice and stop history |
Mark the first visible wrinkle or slack point on the layout. A defect seen at the cutter may have started several rollers upstream.
Establish a Material and Mechanical Baseline
Use one identified roll for the initial test. Record Supplier, lot, GSM, width, diameter, core, treated side, unwind direction, splice locations, and visible winding defects. Telescoping, loose edges, hard bands, crushed cores, or cross-web thickness variation can make a control loop look unstable.
With the machine safely isolated where required, inspect:
- roll centering and shaft support;
- roller cleanliness, free rotation, parallelism, and surface condition;
- dancer freedom, balance, sensor zero, and usable travel;
- brake, clutch, load-cell, or drive condition;
- web-guide sensor position, actuator travel, and frame alignment;
- nip pressure, roller wear, belt condition, and mechanical backlash.
No control setting can correct a seized dancer or a misaligned roller.
Recognize What the Wrinkle Direction Is Telling You
| Observed pattern | Investigation direction | Useful next check |
|---|---|---|
| Diagonal wrinkle from one edge | Roller parallelism, uneven nip, web entering off-square | Compare left and right path geometry |
| Center buckle | Roller deflection, excess tension, cross-web variation | Reduce load in controlled steps and inspect roller crown |
| Loose edge only | Baggy edge or uneven winding | Rotate or change roll and compare |
| Wrinkle appears during acceleration | Inertia compensation or drive coordination | Trend dancer and speed during ramp |
| Wrinkle appears after fold change | Former geometry or unequal layer drag | Return to last approved mechanical position |
These are diagnostic directions, not automatic causes. Change one factor at a time.
Build a Safe Tension Trial from Low Speed Upward
Start from the Manufacturer’s approved recipe for the material family and bag format. Thread the web exactly as documented. At low speed, set enough control to keep the dancer or feedback device within its normal region and prevent slack. Confirm centering and folds before increasing speed.
- Run at a stable low speed and record the actual control value or actuator output.
- Measure bag length, width, fold, gusset, and print position where applicable.
- Increase speed by defined steps while observing dancer position, guide activity, wrinkles, slip, and reject count.
- Repeat through a meaningful change in roll diameter.
- Stop when a limit, defect, or unstable trend appears; preserve the data.
Do not tune the unwind and feed nip at the same moment. Otherwise, the result cannot identify which change helped.
Separate Tension Control from Web Guiding
Tension acts mainly in the machine direction. Web guiding corrects lateral position. Increasing guide action cannot remove a true baggy edge, and increasing tension cannot correct a guide sensor that is following a damaged edge. If the guide continuously hunts from side to side, inspect sensor setup, actuator response, roll alignment, and web condition before increasing gain.
For printed fabric, confirm registration-mark tracking only after the web is mechanically stable. A photoelectric eye can correct phase within its designed window, but it cannot make an irregularly stretching web dimensionally consistent.
Save a Recipe That Includes Conditions, Not Just One Number
A useful recipe links tension-related settings to fabric code, roll width, diameter range, bag style, speed range, nip pressure, web path, guide setup, tooling revision, and quality result. Preserve the actual units. A percentage on one HMI may represent a brake command, not measured web tension.
Revalidate after a change in resin, bonding pattern, recycled content, surface treatment, roll winding, width, core, or auxiliary module. If a Customizable OEM or ODM line uses several bag formats, keep separate approved baselines rather than one compromise setting.
Send Zhengxin a web-path photo, machine serial number, material roll data, wrinkle location, tension or dancer trend, speed, and bag-length measurements. A precise evidence set lets the Supplier review the correct zone instead of recommending a blind adjustment.
ZXL-A700背心袋无纺布制袋机.webp)
 አማርኛ
አማርኛ  English
  العربية
  Español
  Русский
  O‘zbekcha
  Қазақ тілі
  Português (AO90)
  Tiếng Việt
  (فارسی (افغانستان
  Kiswahili
  தமிழ்
தமிழ்  Bahasa Indonesia
  اردو
اردو  हिन्दी
  বাংলা
বাংলা